Let me guess.
You have a niggling pain in your lower back. It’s not painful enough for you to seek medical help, yet it is irritating enough to frustrate you every day. All you want is for it to go away and stop bothering you.
The thing is, there is no lack of solutions out there. There’s yoga, physiotherapy, chiropractic, massage – a buffet of options for you to choose from.
But you just can’t seem to find time to try any of them.
I have good news for you: You can actually relieve your back pain with some simple exercises. Best of all? You can do them right now, without the need to take additional time off your busy schedule.
Ready?
Here they are: 10 Yoga Stretches You Can Do Right Now To Relieve Your Lower Back Pain
1. Downward Dog
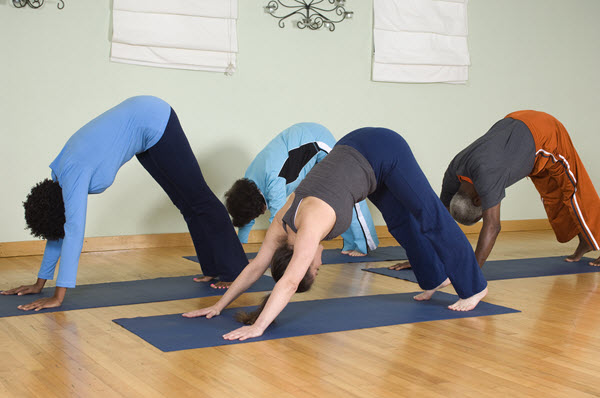
The downward dog is a classic yoga pose that is easy to do. It helps to decompress the spine and open the anterior chest wall — problematic areas that are affected by sitting too long in front of the computer.
How to Do The Downward Dog:
Step 1: Go on all fours on the floor (i.e hands and knees on the ground).
Step 2: Raise your knees and straighten your legs – you should now be in a push-up position.
Step 3: Slowly bring your head through your arms, moving your head towards your feet.
Step 4: The final position should look like you created a triangle between you and the floor.
2. Cat & Cow Pose
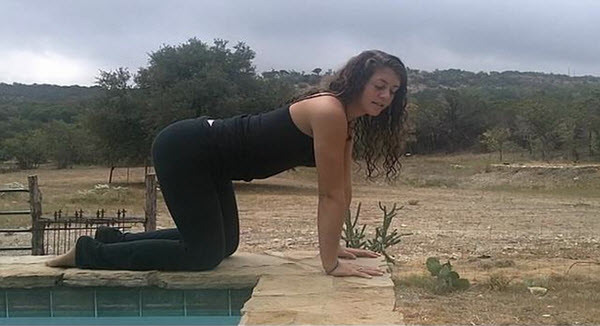
The cat and cow pose helps improve both the flexibility and strength of your core and back muscles. Yogis claim that this particular exercise can help massage and stimulate the organs in your belly, like your kidneys and adrenal glands.
How to Do The Cat and Cow Pose:
Step 1: Similar to the Downward Dog pose, firstly, get on your hands and knees.
Step 2: Bring your head through your arms, while trying to round your back. You can also try imagining you’re trying to bring your belly button towards your spine. Hold this position for about 10 seconds.
Step 3: Raise your head towards the sky and try to imagine moving your spine closer to the floor. You should be feeling your back arch backward. Hold this position.
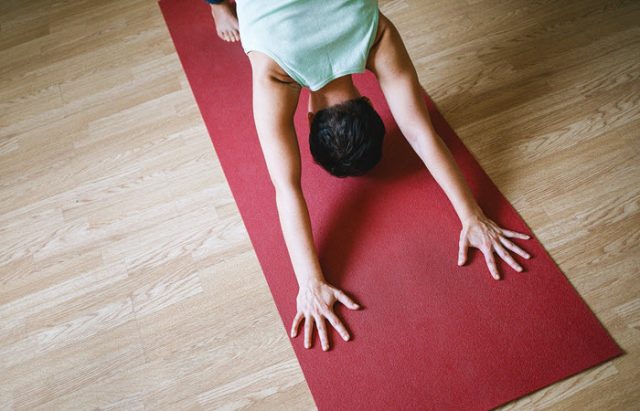
3. Child’s Pose
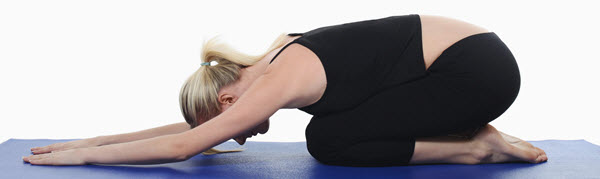
The child’s pose is another yoga pose that is both easy to do and relaxing for the entire body. A simple stretch like this can help release tension in your back, shoulders and your chest. It also helps lengthens the spine – areas commonly affected when you hunch in front of your computer. Yogis recommend this exercise if you have constant fatigue or dizziness as it’ll help to rejuvenate you.
Yogis recommend this exercise if you have constant fatigue or dizziness as it’ll help to rejuvenate you.
How to Do The Child’s Pose:
Step 1: Again, get on all fours on the ground.
Step 2: Slowly move backward towards your heels. Sit your butt down onto your heels. You should feel like you’re in the traditional Japanese Seiza pose.
Step 3: Stretch out your arms in front of you as much as possible. You should feel a stretch down your back.
4. Pigeon Pose
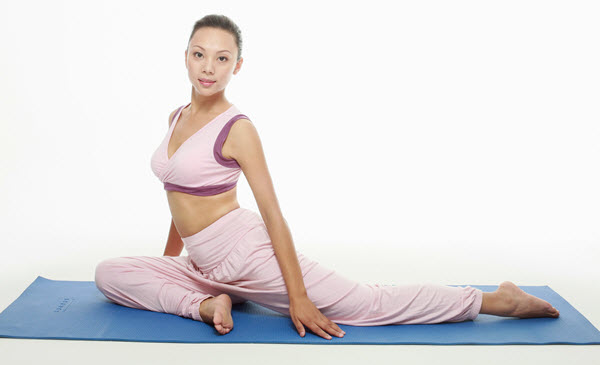
The lack of mobility caused by sitting for long hours tends to impact your hip flexors. The pigeon pose is part of a group of exercises known as the hip opening exercises. These exercises are perfect for tight hips because it helps to stretch the hip rotators and the hip flexor muscles.
How to Do The Pigeon Pose:
Step 1: Go on all fours on the floor.
Step 2: Bend one leg in front of you, perpendicular to your body. (A good way to do this is to imagine as if you were sitting cross-legged). Keep the other leg outstretched.
Step 3: Hold down the perpendicular leg and stretch by keeping your back straight. You should feel a nice stretch down your hips and legs.
5. Cobra Pose
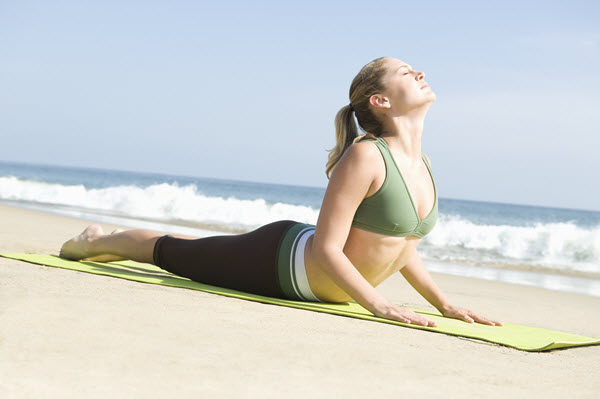
The cobra pose is another exercise that helps lengthen your spine. As a stretching exercise, it helps decrease the stiffness in your lower back while improving your back flexibility. If you’re a lady, also know that this exercise can help to soothe menstrual irregularities.
How to Do The Cobra Pose:
Step 1: Lie flat on the floor.
Step 2: Place both hands beside you, as if you were going to raise yourself up to do a pushup.
Step 3: Raise your chest and neck up, and stretch backward. At this point, your back should feel like it is arching towards your heels. Hold this position.
See Also: 13 Yoga Trends To Immerse Yourself In On Your Journey To Health & Happiness
6. Supine Spinal Twist
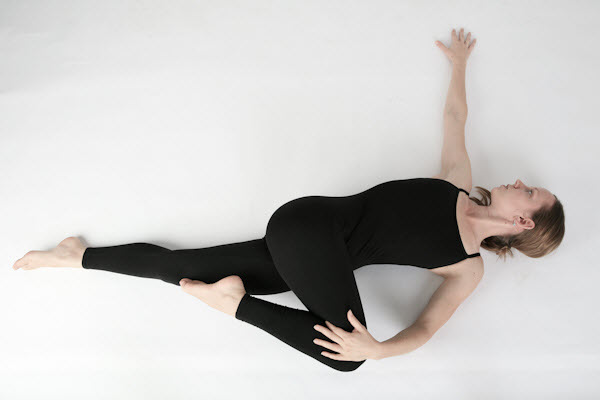
The supine spinal twist helps to address an often overlooked area of the body. This exercise creates space in your lower back, which is an area that is usually overly tight. This tightness causes a wide range of issues from back pain to pain down your legs. If you have poor digestion, yogis also believe that doing the supine spinal twist can help “reset” your digestive system.
How to Do The Supine Spinal Twist:
Step 1: Lie on your back, with your legs 90 degrees in the air. (Pretend you’re about to do a crunch.)
Step 2: Spread your arms flat on the ground beside you. You should look like you’re trying to form a T-shape.
Step 3: Slowly and gently twist your hips to the right side. The side of your right knee will be close to, if not touching, the ground
Step 4: Try to keep both shoulders flat on the ground.
Step 5: Now, slightly raise your hips back to the middle, and then to the left side. Same thing applies: the side of your left knee should now be as close to the ground as possible (without touching).
7. Supine Hamstring Stretch
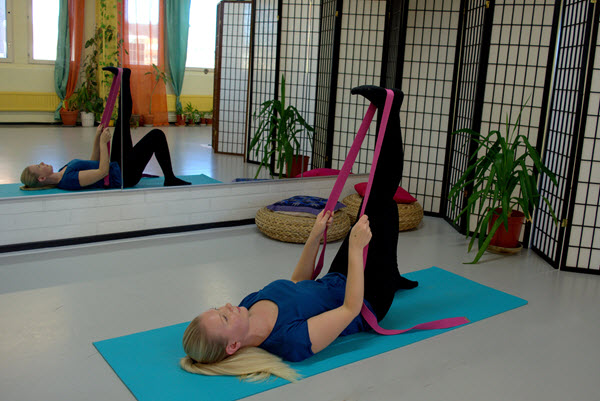
Your hamstring muscles actually get shortened from long hours of sitting – and this affects your back.
Why?
It’s because the health of your lumbar spine is actually directly affected by the health of your hamstrings.
How to Do The Supine Hamstring Stretch:
Step 1: Lie flat on the floor, your legs outstretched.
Step 2: Raise one leg up towards the sky, keeping it as straight as possible.
Step 3: Hold and grab onto the underside of your thigh.
Step 4: You should feel the stretch in your hamstring.
Step 5: Repeat Steps 2 – 4 for your other leg.
8. Thread The Needle
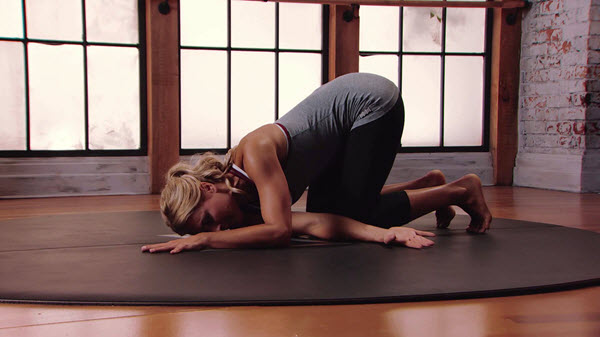
When we talk about damage to the back, we often neglect the upper portion of our back. The truth is, our back extends from our shoulders all the way down to our hips – and excessive sitting affects them all. The Thread the Needle pose helps release the tension that is held in the upper back and between the shoulder blades.
How to Do Thread The Needle:
Step 1: Get onto your fours again, knees and hands on the floor.
Step 2: If you notice, there is a “hole” created between your right hand and your right knee. Place your left hand through the “hole”.
Step 3: Place your left shoulder on the floor and hold this position. For a more advanced variation, you can raise your right hand up.
Step 4: Repeat Steps 2 – 3 for the other side.
9. Legs Up The Wall
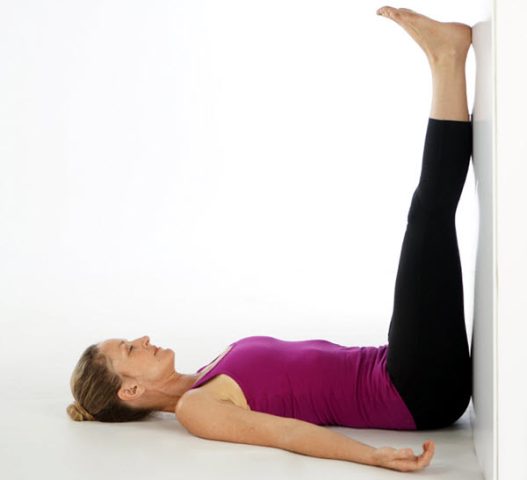
This pose helps to give you all the benefits of inversion – without you having to learn a handstand. Inversion helps to regulate blood pressure, move stuck fluids and improve your digestion.
How to Do The Legs Up The Wall:
Step 1: Grab a pillow or roll a towel until it is as thick as your fist.
Step 2: Walk towards the nearest wall (make sure you have space behind you!)
Step 3: Place the pillow/towel on the floor, preferably about one hand away from the wall.
Step 4: Place your butt on the pillow/towel and lay on the floor.
Step 5: Move yourself closer to the wall so that the back of your thighs are touching the wall.
Step 6: Straighten your legs.
Step 7: Hold the position and stretch.
10. Yoga Bridge
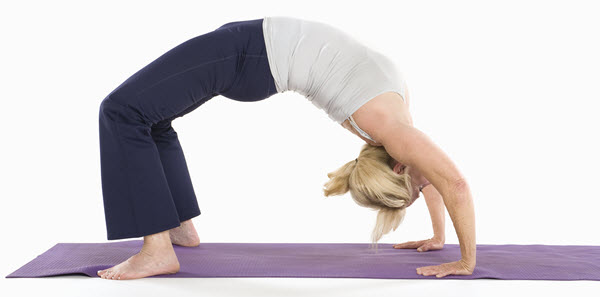
This is probably the toughest exercise in this list. It helps stretch your chest, neck, and spine and rejuvenates your tired legs. It is also beneficial for ladies who are experiencing menstrual issues and can even be therapeutic for people who have asthma, osteoporosis, and high blood pressure.
How to Do The Yoga Bridge:
Step 1: Lie on the floor with your feet tucked near your bottom.
Step 2: Raise your hips up slowly and lift off your thighs and lower back. The only point of contact between you and the floor should be your feet, your upper back, shoulders and neck.
Step 3: You can leave your hands on the floor, or for a more advanced variation, place your hands on your hips.
Step 4: Hold the position for at least 15 seconds.
Step 5: Recover by unrolling your spine (i.e place your lower back on the floor first, then hip, then your butt.) Do not just let go! You might injure your hips or spine.
Now that you have 10 exercises you can do any time in the office…
How should you proceed?
All you have to do is to choose one of the above exercises and incorporate it to your daily routine. Set a timer (on your phone or your watch) to remind yourself to take a break from work every two hours to do the exercises. They will give you a quick relief from your back pain, and also help to strengthen the various parts of your body important to your back health.
See Also: Five Simple Ways To Beat Low Back Pain